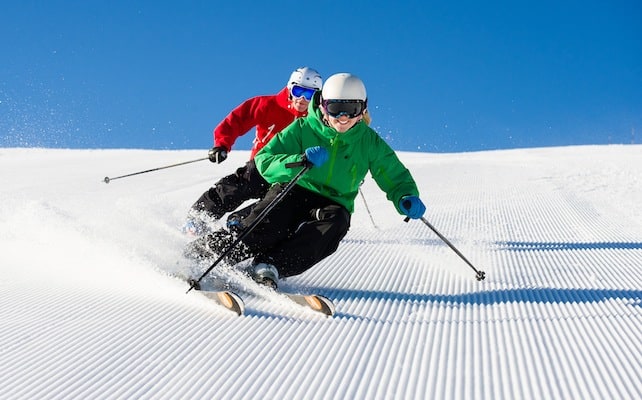
It’s no secret that skiing makes for great photographs (and great photographs make for excellent Facebook profile pics and lots of likes on Instagram!). So whether you’re training for a career in the ski industry or just on a ski holiday this year, you’ll want to make sure you get some great pictures to show your family, friends, and whoever else follows your social media.
But is it really that easy to take great ski photographs? Unless you’re a professional photographer, it can actually be quite difficult. Despite what you might think, the combination of the temperature, conditions and environment all have an effect on your photography skills. So how can you make sure that you take a good selection of photographs on your skiing trip this year?
To help you, I’ve put together a few hints and tips for you to follow in 2015, from what equipment to use and how to use it, to the most popular skiing picture poses.
The Equipment You’ll Need
You can’t be a photographer without a camera, but not just any old one will do. You need to make sure you have the right equipment so that you can take the best pictures. So what exactly do you need? Any decent digital or SLR camera will work well, but make sure it’s lightweight and portable – you don’t want to be carrying around a giant camera all day!
This goes for extra equipment, too. Lenses and tripods all sound like great ideas, but in reality they’re just going to hinder your movement and make you tired. Stick to something you know you can handle and won’t weigh you down all day. Action sports photographer Melody Sky, whose portfolio includes the Winter X Games, has some great advice on picking a camera for your next ski holiday , with recommendations on top-end DSLRs as well as more affordable compact cameras.
You should also make sure you do everything you can to protect your equipment from the elements. Cold, snow and rain will do terrible things to a camera, and you don’t want to wind up losing all of your photos when you fall into the snow, drop it on the floor, or when it gets too cold and breaks.
Make sure you have a secure, warm pocket preferably somewhere near to your body to keep the camera when you’re not using it. Cold environments can also run the battery down rather quickly too, so keep a spare if you can, just in case. You also need to be wary of condensation. Taking your camera from extremely cold environments into warm ones will cause condensation to form all over it, and we all know that electronics + water = not good.
Leave it somewhere it can warm up slowly, like in your bag in the hallway, so that you can avoid this potentially fatal issue. You don’t want your camera dying on you due to water damage! Ski photographer Dan Carr says in this article on Telegraph Travel, ‘the most important thing to do is to dry everything thoroughly once off the mountain,’ so make sure you make that the priority – you can hang up your smelly socks to dry after.
The Best Camera Settings for Ski Photos
Whilst you may not think that camera settings make much of a difference, they definitely do. When you’re taking photographs in snowy, sunny environments, the combination of whiteness and glare can make taking anything decent pretty difficult. The camera adjusts for the whiteness and underexposes the image, making everything too dark, shadowy and murky. This is where your camera settings can help you.
Digital and SLR cameras will usually come with a number of different scene settings, which let you tell the camera where you’re shooting so it can adjust itself accordingly. There should be a ‘snow’ setting in there somewhere, and using it will stop underexposure, and leave you with bright, crisp images. This article from Digital Spy has some more great tips about adjusting your exposure, if you want to find out more.
ARVE Error: For the maxwidth (maxw) option you need to have normal or lazyload mode enabled, either for all videos in the plugins options or through shortcode e.g. [youtube id=123456 mode=normal maxw=999 ].
Flash is another setting you’ll need to adjust when shooting in the snow. When you’re taking that perfect group shot at the top of the mountain of all the friends you’re skiing with, the sun can be a problem.
If it’s particularly high in the sky it will give you great definition on your background, but may blur the subjects in the foreground – something you don’t want to happen. How would you then be able to tell who they are and tag them on Facebook?
To get around this, you can employ a technique some photographers call ‘fill-in flash’. Fill-in flash works by forcing the camera to use the flash function, even in broad daylight. This still gives you a good exposure on your background, but fills in the shadows on your foregrounded subject, making them appear more clearly in the picture.
When to Shoot
The ideal time to shoot ski photos is either early morning or late afternoon. This is because at these times the sun is at an angle in the sky, and will give your pictures a warmer feel.
It also won’t flatten out the image and fill it with glare. If there are any specific shots you want to take, it’s a good idea to plan them in at these times so that you can get the best pictures possible.
Arranging Your Shot
You’ll probably already have some idea of the shots you’ll want to take, but whether they’re group shots of your skiing class or photos of the landscape, you’ll need to spend some time thinking about how to arrange them if you want to make them as good as possible. First, consider the position and angle of the sun – if it’s too high in the sky it could ruin the photo. What you do next depends on what you’re shooting, but here are some general tips.
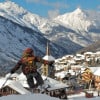
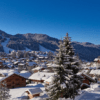
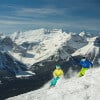
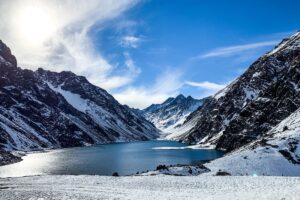
For shots of the slopes in most ski resorts, angles are key. You want to tilt the camera a touch and keep other objects out of the frame; this will accentuate the angle of the slope and make it all look bigger and more overwhelming. For any photograph you take, make sure the horizon is level. For shots of the landscape, symmetry is a nice touch, as is placing a person at the centre of the photograph, but in the distance to emphasise the size of the landscape around them.
Finally, practice makes perfect. Shooting standing on snow is different to shooting standing on solid ground, and the cold can make your hands shake, which can blur the image. Take some test shots early on, find out what you need to work on, and start practising!
The Different Types of Ski Photograph
So now that you’ve got your equipment sorted and your techniques perfected, here are some skiing shots for you to try out during your skiing season…
1. The Pose

What’s the first thing you do when you arrive and are greeted by the sublime natural landscape you’ll find at the top of most major cable cars? Do you stop for a second, stare and take it all in? Wander off on your own to experience the true intensity and overwhelming power of the landscape? Do you try to spot what will be your favourite run or slope?
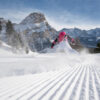
Whichever one of these you choose to do first, you can bet it will make a great picture. Try to emphasise the enormity of the landscape in these shots, or the fashionable ski wear of the subject, whichever works best!
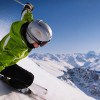
2. The In-Air Shot

Preferably taken from underneath or to the side of your subject, the in-air shot is a favourite amongst new learners, wannabe snowboarders, and park rats. You need a good lens for this one, as focusing on moving objects can be difficult.
You might even want to use multiple exposures to get the skier all the way in flight.
3. The All-Action Hero

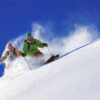
This kind of shot is taken whilst touring across unforgiving landscapes, or gliding down the toughest run with ease. Similar to the in-air shot, this one requires focus, a steady hand, and a good lens.
The best photos of this kind include spraying snow, treacherous conditions, and only the steepest of slopes. Photographer Ryan Davison Crisp perfected this during his time with Alltracks in 2014, and if you check out the galleries on his website, you’ll see that the results are telling. Plus he’s now a qualified ski instructor too, which certainly does no harm in developing an eye for that perfect shot.
4. The Comedy Shot

Ideally taken when someone (preferably not you) has fallen, or is in the process of falling over. Other notable shots include those taken during snowball fights, at the bar, or wearing novelty hats and glasses.
5. The Gang

A seasonnaire favourite. If that’s you then ‘The Gang’, also know as a group shot, should be taken at the end of your ski season. Gather all the great friends you’ve made and take one final group shot so everyone can remember how much they enjoyed their season.
Be sure to include your instructors, students, the barmen, and everyone else who made your ski season something to remember. Those included will be asking for a copy for their Facebook cover photo or profile picture, and they won’t be pleased if it’s blurry and out of focus. So don’t mess this one up – it’s an important one!
What Do You Reckon?
There you have it – my guide to taking the best ski photos this year during your ski season. Hopefully you now know a bit more about ski photography than which filters work best on Instagram!
Whether you’re planning on attending a ski instructor training course, shredding the backcountry, enjoying a family holiday or doing a ski season for the fun of it, this guide should ensure you return with some great pictures.
What’s the best ski photo you’ve ever taken? I’d love to hear about it in the comments below.
Originally published on alltracksacademy.com/take-great-skiing-photos.



I believe you mean underexposure – that’s why images appear dark.
Well spotted Charley, thanks. We’ve fixed that.